- Unbox it
- Put in the Paper
- Put in the Ribbon
- Connect the Bluetooth
- Calibrate
Here's a video, but make sure you check out the steps below too:
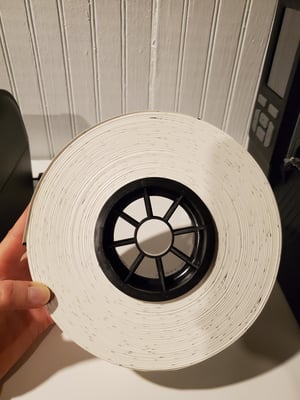
Install the paper roll into the printer
Here's a quick video of how to do this, detailed steps included below as well:
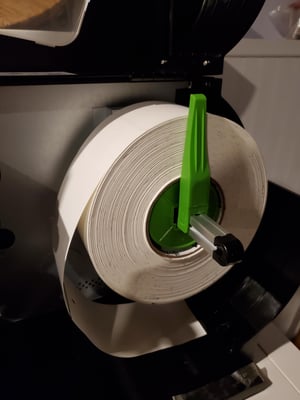
Your paper may come with a plastic piece inserted in the opening to keep it from crushing the roll during shipping. REMOVE IT.
 .
. 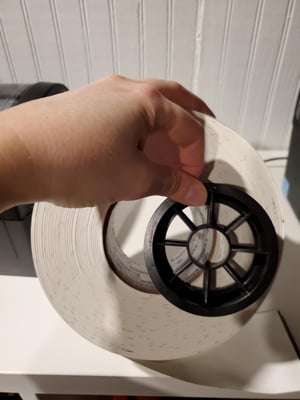
To load the paper, there's a green arm attached to the paper spindle. Pull out the green arm and then lay it parallel with the spindle (see below). The round green guides keep the paper level on the spindle.

Load the paper so it sits on the round green guides, then pull up the green arm so it's perpendicular to the spindle and slide it towards the roll.
The green arm helps keep the paper in place on the spindle so it doesn't shimmy when it's printing.
It doesn't matter if the green arm is pointed up in the machine or down, either way gets the job done.
 .
.
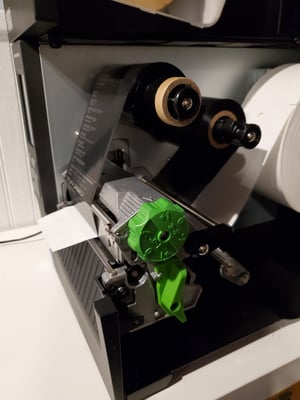
Open the printhead
Make sure the print head assembly is open. If it's not use the small green lever to open it up.


Adjust the sensor before feeding the paper under the printhead
Here's a video of how to adjust the sensor, detailed steps included below as well:
First, identify the sensor part of the machine:

The sensor moves - There's a little green flat area that helps you move the sensor - push it towards the metal wall of the printer, then pull it out gently - you will hear 1 click, if you hear more than 1, it's too much. Push it back in and try again.
The position of the sensor is what's likely to cause most "Media Out" warnings on the printer - so it's important that you feel out how to move this component.

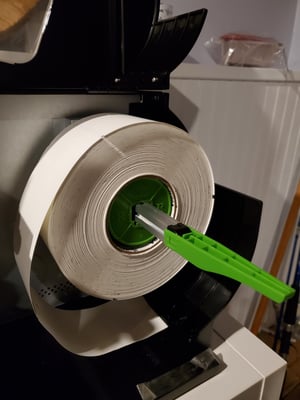
Install the Ribbon
Here's a video showing how to install the ribbon, then detailed steps below:
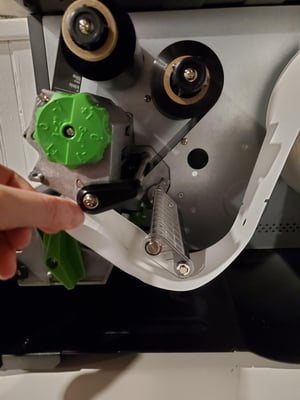
- First, install the ribbon onto the middle spindle in the machine, to the left of the paper. The media should fall down from the right side of the ribbon roll.
- The other spindle should have a paper core attached, this is where the used media ribbon ends up.
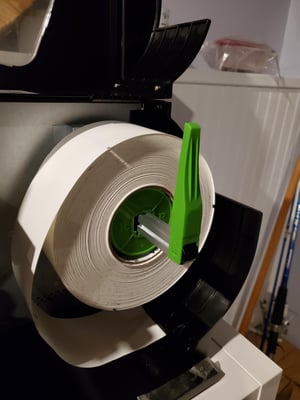
- Feed the ribbon under the print head assembly through to the other side and wind it onto the other spindle. You can use a little scotch tape to keep it in place, just make sure it's very flat.
- Wind up the ribbon media until it feels secure- just a few times around.
It's important that you make sure to get the ribbon media as flat as possible on the second spindle. The flatter it is, the more even the print job.
Here is how it should look:
.jpg?width=300&height=4032&name=Image%20from%20iOS%20(145).jpg) .
. 
Feed the paper through the machine and under the printhead
Here's a video of how to feed the paper, details below:
- Pass the paper under clear plastic "Damper" with black rollers on the bottom
- Feed the paper under the open print head and through paper guides to the other side of the machine:
 .
. 

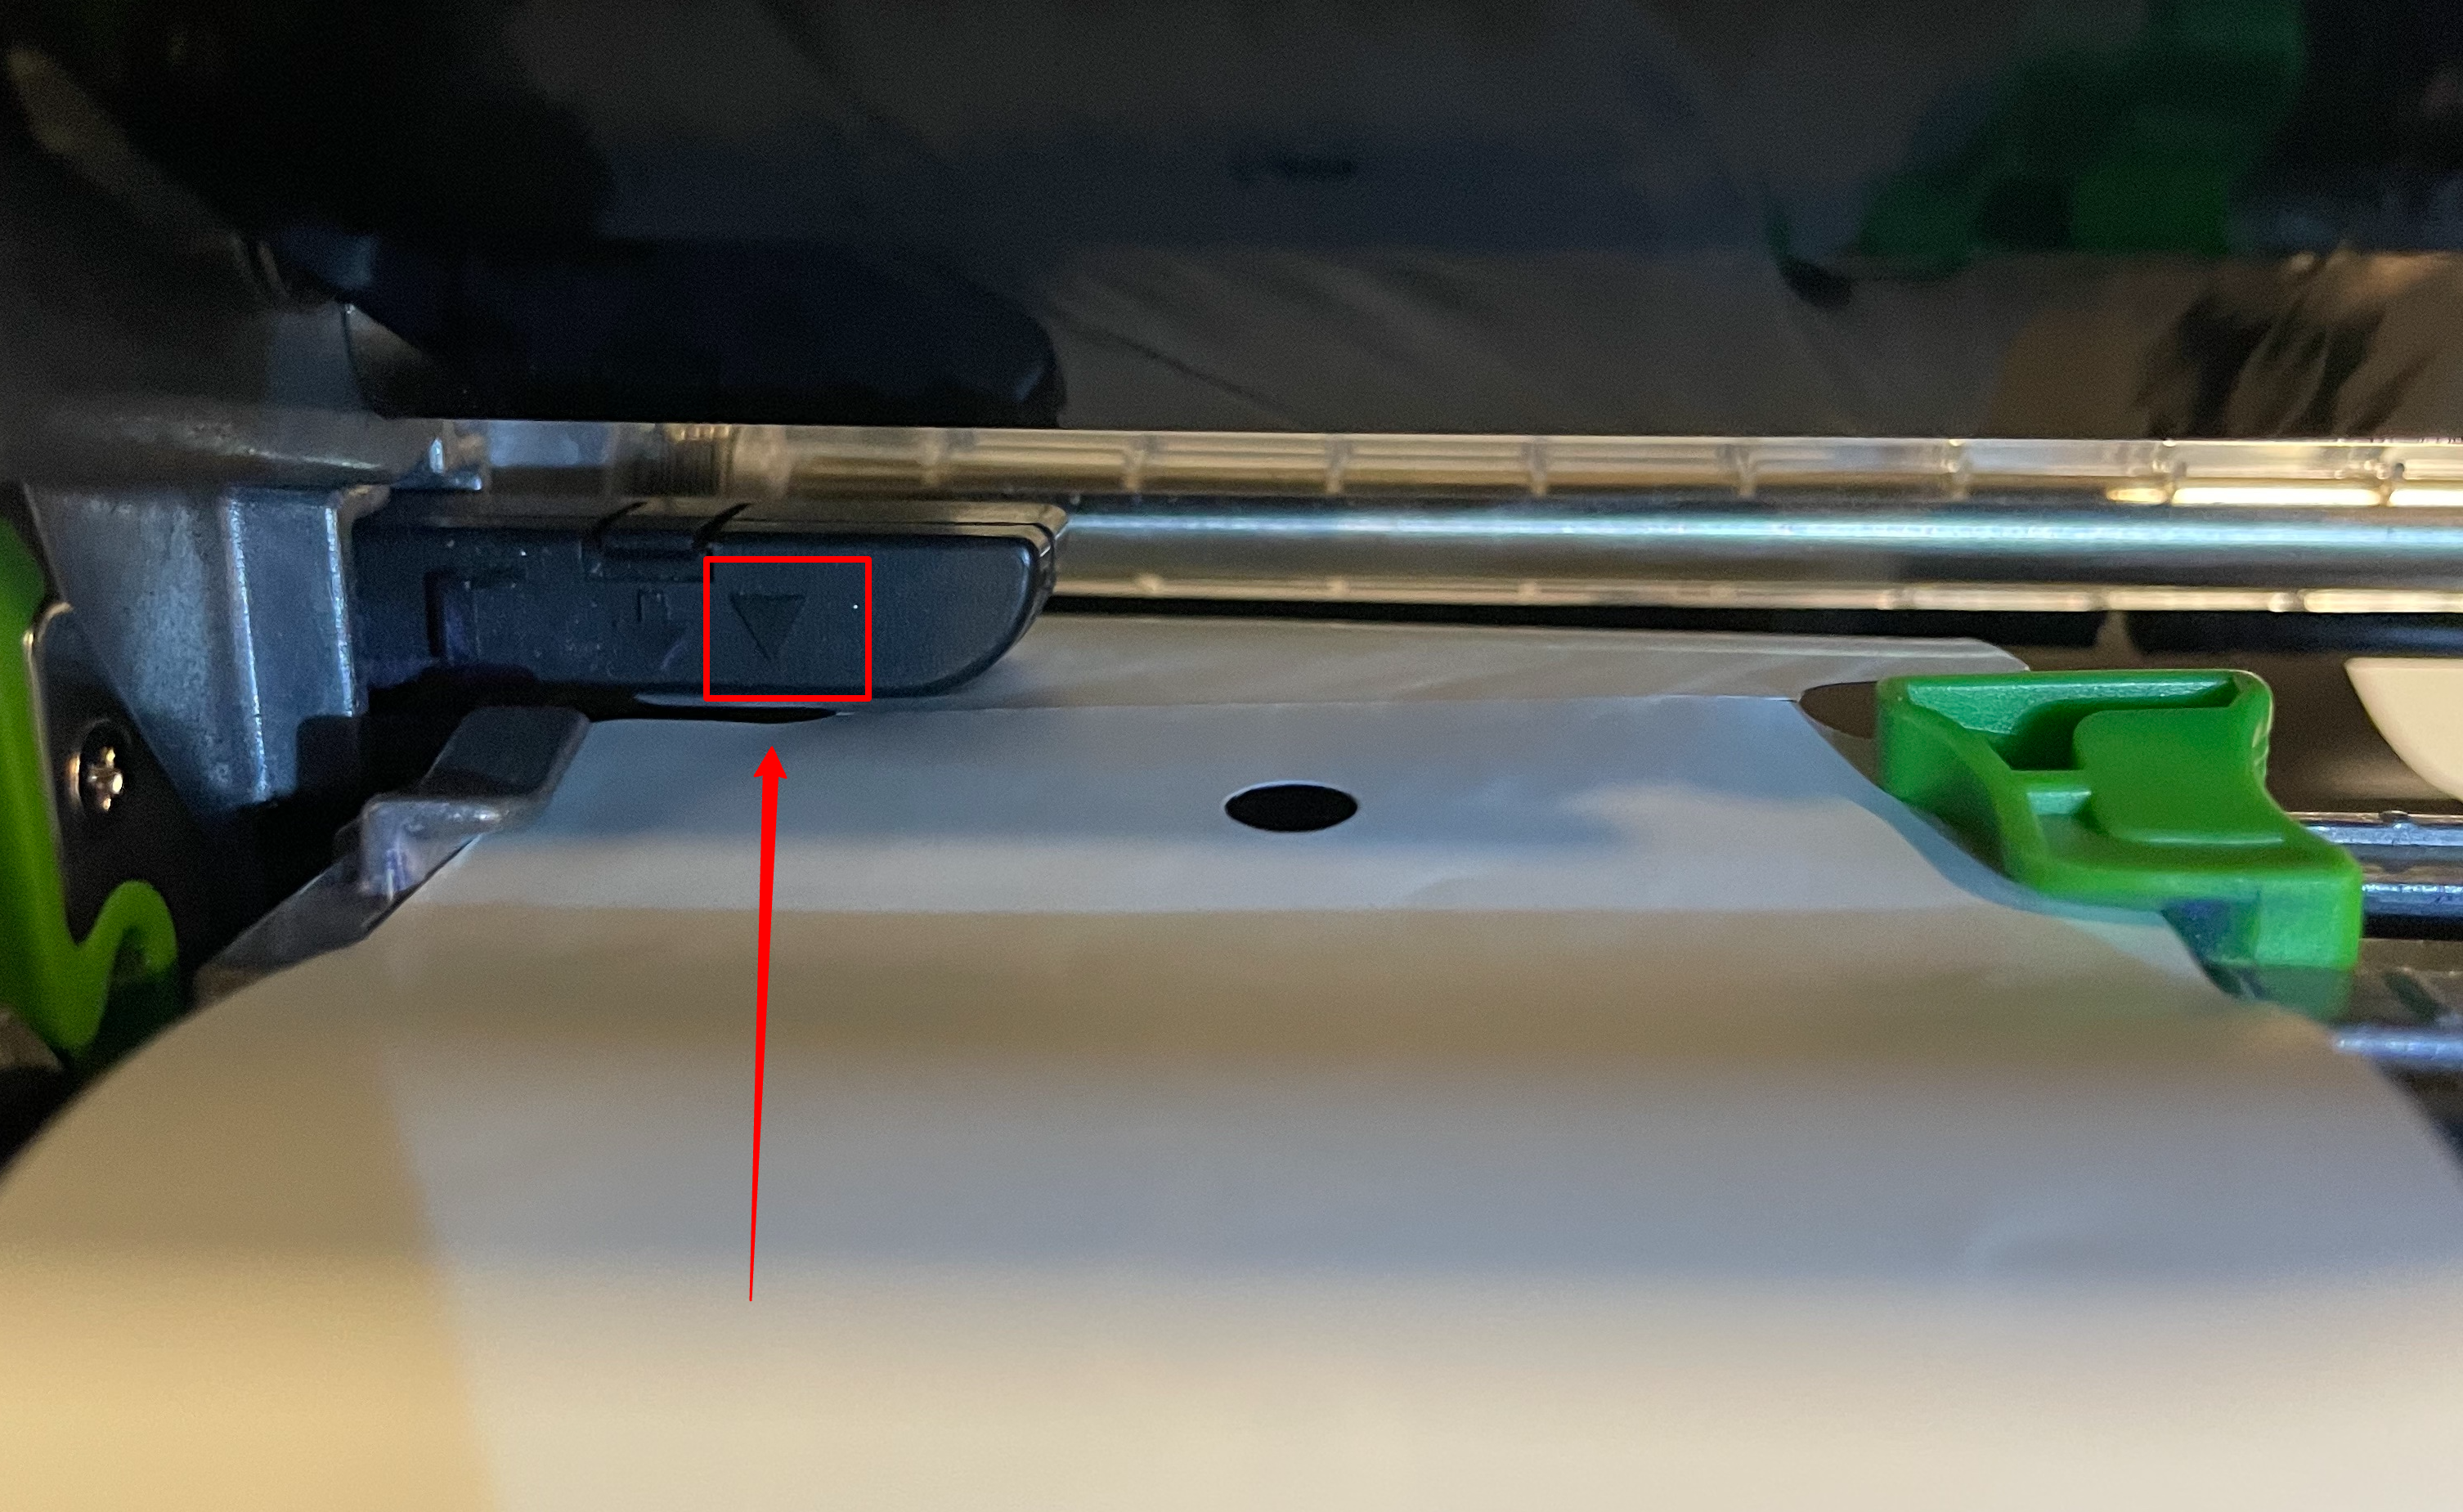
Check the sensor position in relation to the paper
On the sensor bar, you can confirm the position is correct by looking for the upside down triangle. If you have notched paper, ensure the triangle is pointing over the notch. This is so the printer can detect when one sheet ends and the next starts.
If you do not have notches on your paper, then the ARROW (next to the triangle is what's used to detect the black line on the back of the paper - you might need to adjust it so it's pulled out 1 more click.
Close the printhead
Before calibrating, make sure the print head is closed and the green knob shown below is oriented as shown:

Connect to BlueTooth
- Make sure the printer is plugged in and switched on
- Open the Settings App on your iOS device
- Tap BlueTooth
- Find the new device - might look like RF-BHS or PS-Something...
- Tap the device name to connect
- When it asks for a code, enter 0000
- You should now be connected to the device
Calibrate the Printer
- Once the media is installed, close the print head assembly by pushing it down.
- In the app, navigate to Settings > Printers > Connected Printers > tap on the printer you're connected to (something like TSC MB240 should be displayed)
- Adjust the settings so that they match the paper you are using - set all the "Important Connected Printer Settings" (see details below). Then SAVE.
- Then from the App "Printer" screen, tap "Calibrate" - Some unused paper will get spit out during the calibration, that's expected.
Important Connected Printer Settings
- Media Mode:
- Tear off: this is the most common, this simply means you tear the sheets apart by hand after printing
- Cutter: Tags with Tails: if you're using a cutter and your tags have a long, skinny tail to attach it to a bag.
- Cutter: Tags without Tails: if you're using a cutter and your tags have notches or black lines
- Calibration Type:
- Black Line: if there's a black line on the back of your paper this should work
- Notch: if you have paper with an indent on either side of the perforation, then you have notched paper. Use this calibration type and make sure the printer sensor (the black bar with the arrows over the paper) is positioned over one of the notches.
- Paper Size:
- 7 Inch: most common
- Small: this is 5.5" x 2.625" paper
Troubleshooting
Issue: Print job is too far to the right on the printed sheet
First make sure the paper is snug in between the metal guide towards the interior of the machine and the green guide on the other side.
If that doesn't work, you can adjust the horizontal offset on the printer so nudge the print job over. To adjust the offset, Tap Menu > Settings> from the list displayed find "Shift X" and adjust this to be about 10 or 20. Tap back to get to the main menu. Try reprinting 1 tag. You may have to try a values under "Shift X" to nudge the print job over to where you want it.
Issue: Print job is too light/faint.
Check and Adjust the Printer's Density: On the printer tap Menu > Settings > Density > increase the density, then tap back to get to the main screen. If the density is '0', then your printer will shoot out blank tags without any printed text.
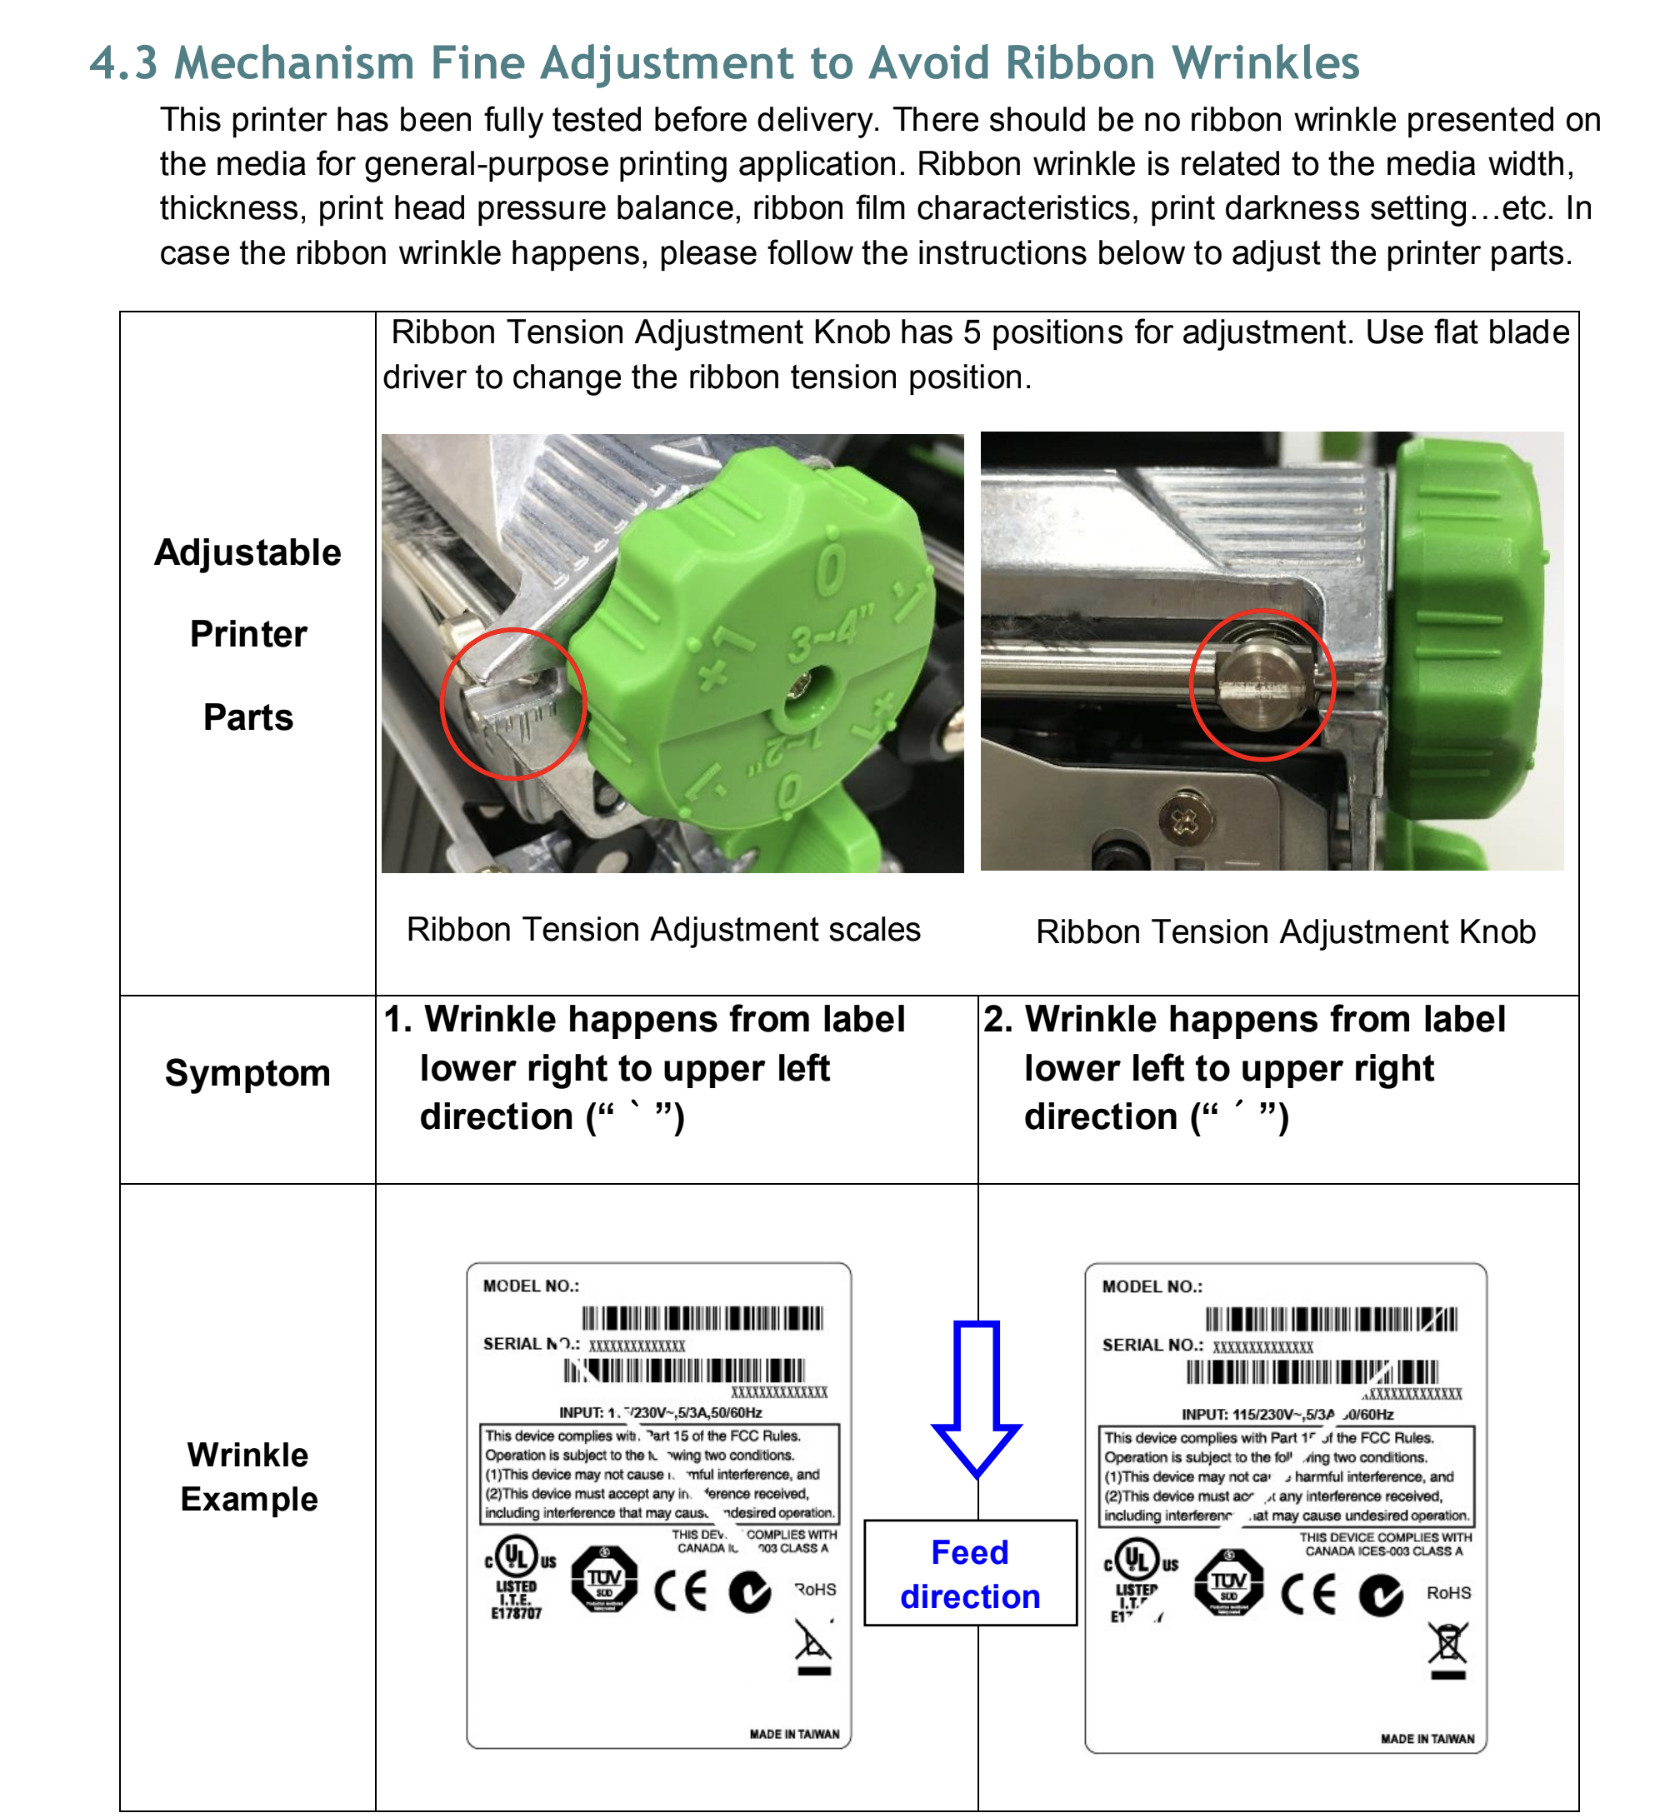
Adjust the pressure of the print head: Make sure the ribbon is flat and the use the green knob to control the pressure. It should be on 3-4" (that's the width of the paper) and move +1/0/-1 (see the picture below) to control pressure. +1 on the left means more pressure..jpg?width=300&name=Image%20from%20iOS%20(143).jpg)
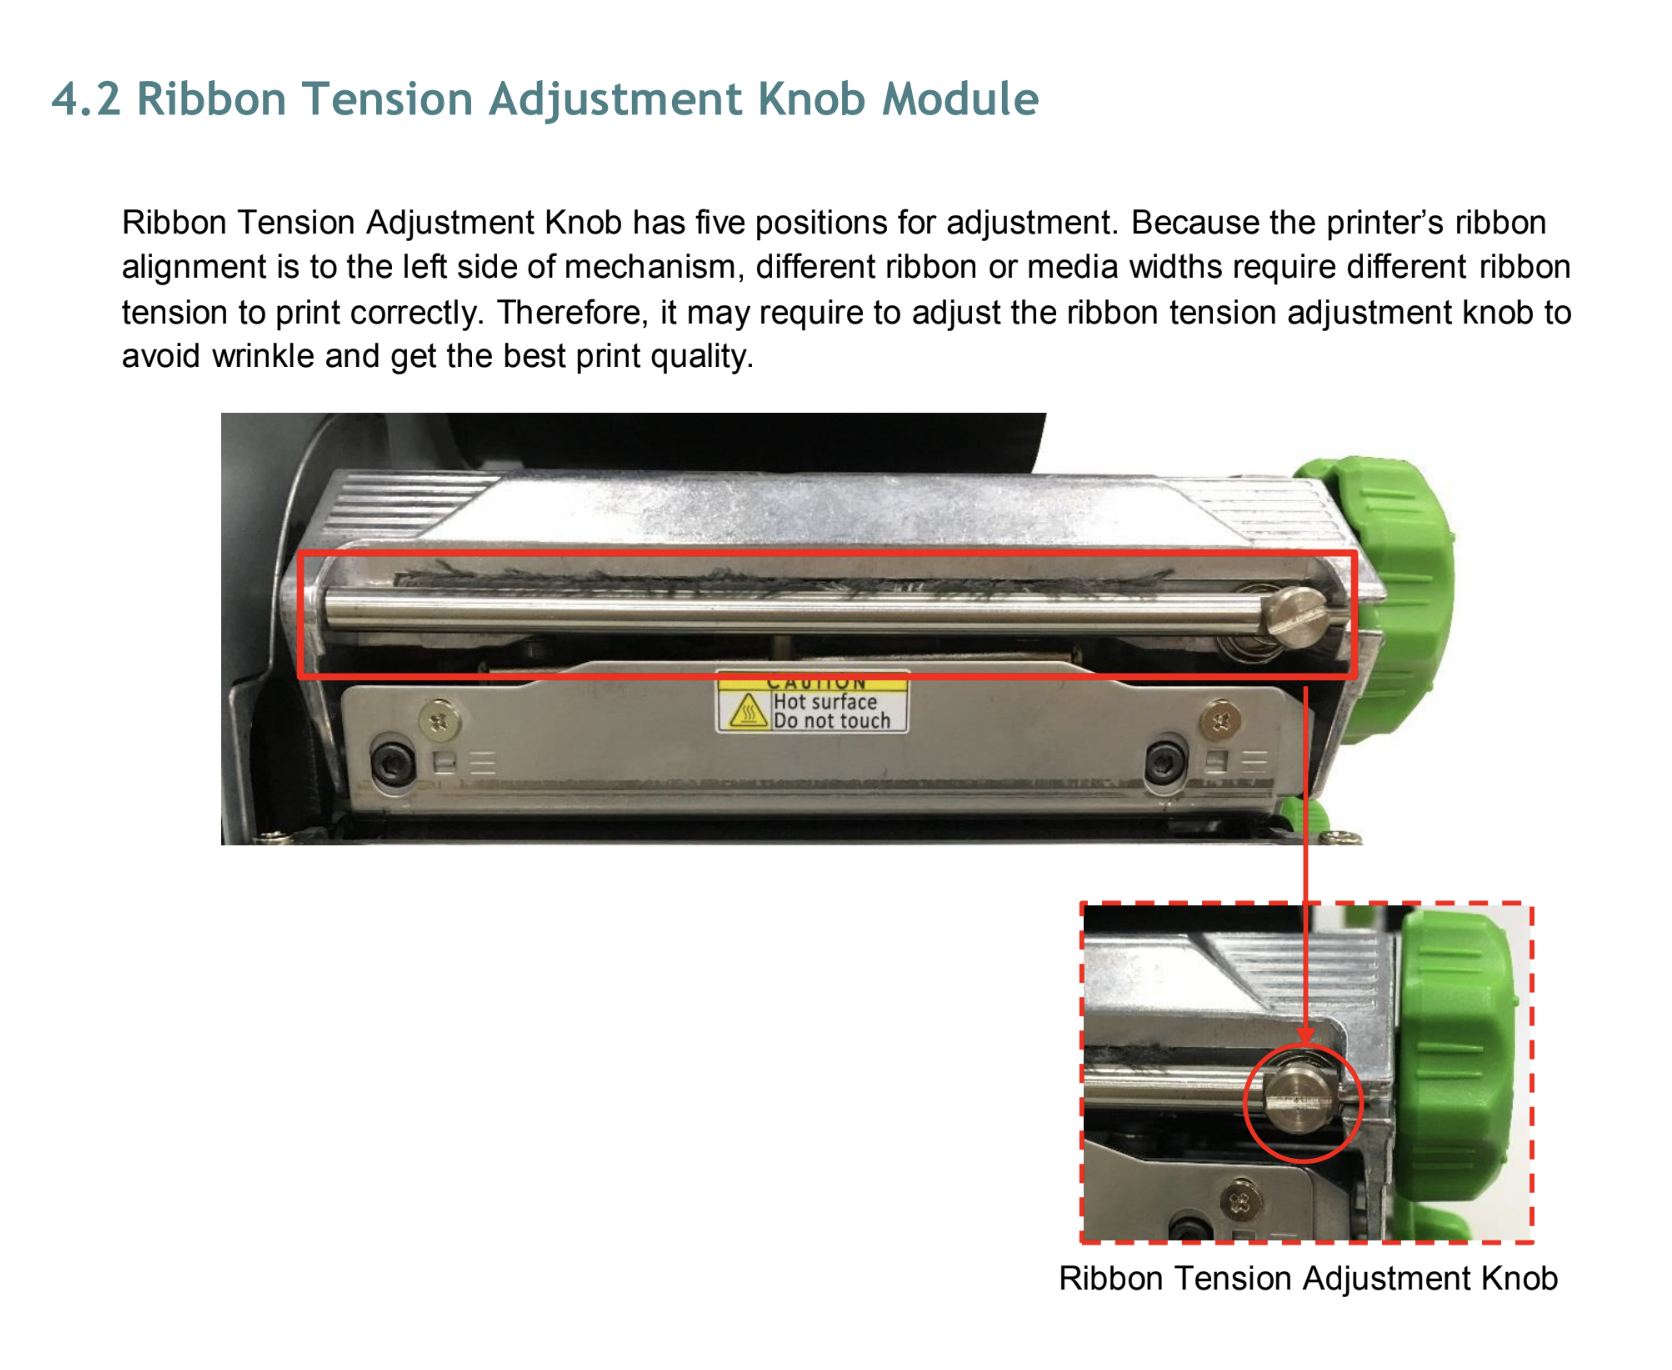
Issue: White marks on your print job.
Adjust the ribbon tension knob:
Issue: Media Out
Calibration: Most often this error is caused by a calibration issue. See the calibration steps above.
Adjust the paper guides: There are a few guides which keep the paper in place. The first is a green guide (see picture below) which should be against the outside edge of the paper. The other is metal and attached to the back of the machine. Finally, there's a black arm that moves over the top of the paper - that's the sensor.
Paper is not against the roller: open the print head, make sure the roller can catch the paper to feed it forward and out of the printer, close the print head, tap FEED on the printer.
TSC MB240 Manual
Here is a link to the manual where there are more photos and details: https://fs.tscprinters.com/system/files/mb240-series_user-maunal_new_en.pdf