If you haven't already, download the BlueTrace Tag Printing app from the AppStore and log in with your username and password.
There are three screens within the app, displayed along the bottom of the screen:
- Enter Tag: where you enter information you'd like to save in your log and print tags
- Log: where you can see all the records you've saved
- Settings. We’re going to start with Settings.
Settings
Add everything that might end up on one of your tags or in your log, starting with Licence Holder Info and working your way down. Adding data like PFMA, Facility Reference #, and Landfile # now will make creating tags and log entries easier.
Navigate to Settings > Operations > then here are some areas to fill out:
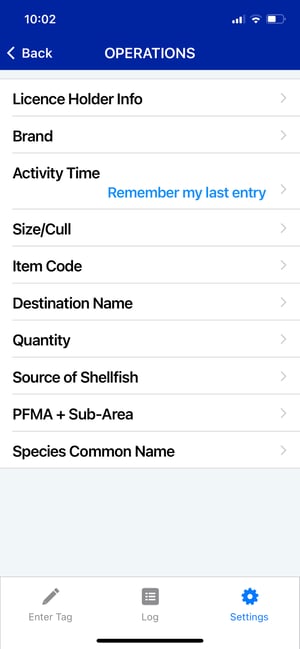
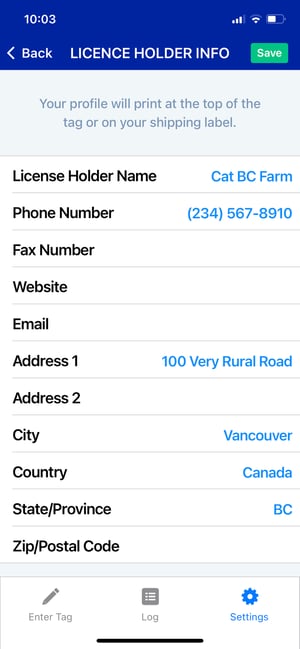
- License Holder Info: This is the information about your organization printed at the top of the tag
- Brand: This is whatever informal name you give to your shellfish
- Activity Time: this field will populate the time of various activities with either NOW, the last time you used, or it can be blank - example: Harvest Time
- Size/Cull: these are settings used to describe the size of your product if you process it by size
- Item Code: used if you carry/sell a wide variety of products
- Destination Name: This is the processors or dealers you sell your product/shellstock to - you can also add in their CFIA License # or BC Landfile #
- Quantity: as a default, this is not used in BC, but if you need something more specific, like bags of 5 dozens, we can set that up for you. Otherwise, BC recording keeping requirements only need a more generic, gross quantity, ex: 5 totes, 1 net, 2 crates
- Source of Shellfish: If you got shellfish from somewhere else, you can record this in your log
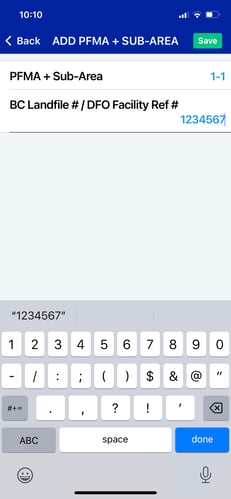
- PFMA + Sub-Area: this is the location of harvest and your BC Landfile # or DFO Facility Reference # for that location:
- Typically this is filled in like the example below, but you can also include the name of the location in the PFMA + Sub-Area field
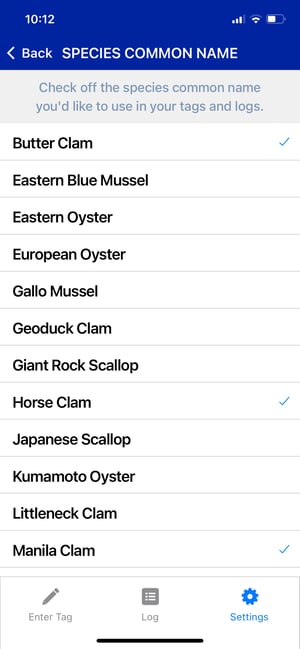
- The Species Common Name field is a little different than the others. Tap in here and select every species that you handle. That way, you'll see only the types of animal relevant to you when creating a tag or log entry.
Enter Tags / Create Records
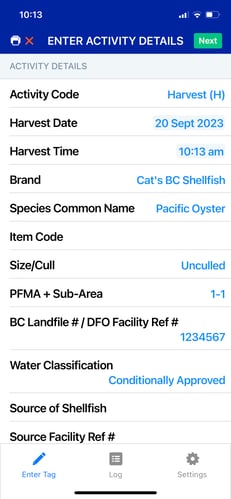
Once you have loaded your data into Settings, you can start printing tags and creating log entries.- Tap into the Enter Tag screen (bottom left on your screen)
- Fill out all required and relevant fields
- Tap Next (upper right)
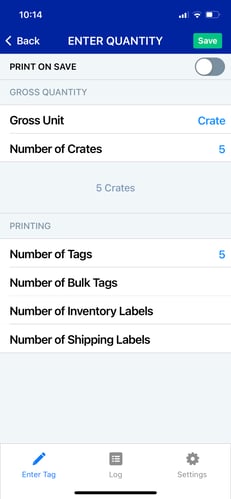
- Input quantity, then tap SAVE - you can also print tags right away if you'd like or wait until later
- If you do not want the # of containers to populate the # of tags to print, you can disable this in settings. Settings > Temp & Processing > Auto-Fill Tag # w/ Container # > toggle this to OFF
 .
. 
Record Keeping Log
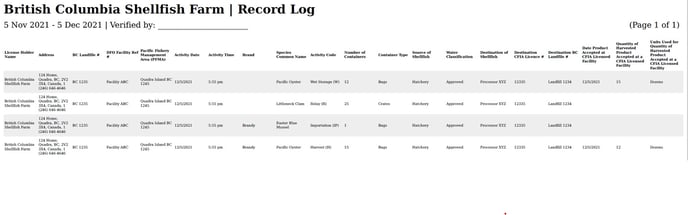
Once you record an activity, an entry is automatically created and added to your Log.
You can export (upper left on your screen) this log at any time to generate a spreadsheet formatted according to DFO requirements.
Happy harvesting!